Using Ext Gantt with React
We strive to keep posts updated, but code samples may sometimes be outdated. Humans, see the Bryntum documentation; agents, https://mcp.bryntum.com for the latest info.
React is a very popular library for front-end development. It makes it easy to build state driven views and it efficiently handles DOM updates. React is component-based and in this blog post we are going to explore how to wrap Ext Gantt as a reusable React component.
Prerequisites
In this guide we will use React with JSX. We are going to load React and Babel from unpkg.com (a CDN) and Ext Gantt from bryntum.com (our trial version), so no installation is required.
Add index.html
We are going to create a React app and as stated in the Prerequisites above we need to load some external libraries. Start by creating an index.html file with the following contents:
<!DOCTYPE html>
<html lang="en">
<head>
<meta charset="UTF-8">

<!-- ExtJS and Ext Gantt css -->
<link href="/examples/extjs-6.0.1/build/classic/theme-triton/resources/theme-triton-all.css" rel="stylesheet" type="text/css"/>
<link href="/dist/gantt-for-extjs/resources/css/sch-gantt-triton-all.css?ver=" rel="stylesheet" type="text/css"/>

<!-- React JS -->
<script src="https://unpkg.com/react@15.3.1/dist/react.js"></script>
<script src="https://unpkg.com/react-dom@15.3.1/dist/react-dom.js"></script>
<script src="https://unpkg.com/babel-core@5.8.38/browser.min.js"></script>

<!-- Ext JS and Ext Gantt JS -->
<script src="/examples/extjs-6.0.1/build/ext-all.js" crossorigin="anonymous" type="text/javascript"></script>
<script src="/examples/extjs-6.0.1/build/classic/theme-triton/theme-triton.js" type="text/javascript"></script>
<script src="/dist/gantt-for-extjs/gnt-all-debug.js?ver=" type="text/javascript"></script>

<title>React demo</title>
</head>
<body>
<div id="gantt-demo"></div>
</body>
</html>
We now have an empty page that includes both React + Babel and ExtJS + Ext Gantt. It is time to wrap the Gantt chart as a React component, which will make it easy to use in React apps.
Create a React component
To keep the code clean we are going to create the component in a separate file. Create a file named gantt.jsx and include it in index.html below the div tag:
// existing line
<div id="gantt-demo"></div>
// load the react component from gantt.jsx <script type="text/babel" src="gantt.jsx"></script>
Add the following to gantt.jsx:
// a wrapper for the gantt chart to simplify usage with react
window.Gantt = React.createClass({
    // called after reacts render, which yields a div
    // create a gantt chart and render it to that div
    componentDidMount : function() {
        var config = {

            // store that holds all tasks
            taskStore : {
                type     : 'gantt_taskstore',
                autoLoad : true,
                proxy    : {
                    type : 'ajax',
                    url  : 'data/tasks.json'
                }
            },

            // store that holds dependencies between tasks
            dependencyStore : {
                type     : 'gantt_dependencystore',
                autoLoad : true,
                proxy    : {
                    type : 'ajax',
                    url  : 'data/dependencies.json'
                }
            },

            // settings
            width            : 1000,
            height           : 400,
            eventBorderWidth : 0,
            split            : false,
            viewPreset       : 'weekAndDayLetter',
            rowHeight        : 30,

            // predefined columns
            columns: [
                { xtype: 'namecolumn', width: 150 }
            ],

            // renders to the div created in render() below
            renderTo : 'gantt'
        };

        // store the rendered gantt chart in state for later access
        this.setState({ widget : Ext.create('Gnt.panel.Gantt', config) });
    },

    // just renders a div that we use to do the actual gantt chart rendering
    render : function() {
        return (
            <div id="gantt"></div>
        );
    }
});
The code above defines a React component called Gantt. It renders a div to the page (in the render() method which React calls to display the component). The div is then used as a container for our gantt chart, which is created in componentDidMount() (called by React after render).
The gantt chart includes some basic configurations for width, height etc. as well as also two stores which loads data from json files (in the zip if you download the example). In case we need to access the gantt chart later, it is stored in the React components state using setState().
Create a React app
Lets make a simple React app to try our new Gantt component out. Start by adding a script tag using Babel to index.html, below the script tag for gantt.jsx:
// existing lines
<div id="gantt-demo"></div>
<script type="text/babel" src="gantt.jsx"></script>

// new script tag for our React app
<script type="text/babel">
// code goes here
</script>
Now add the following lines to the script tag:
var GanttDemoApp = React.createClass({
    render : function() {
        return (
            <div>
                <Gantt/>
                </Gantt>
            </div>
        );
    }
});

ReactDOM.render(
    <GanttDemoApp />,
    document.getElementById('gantt-demo')
);
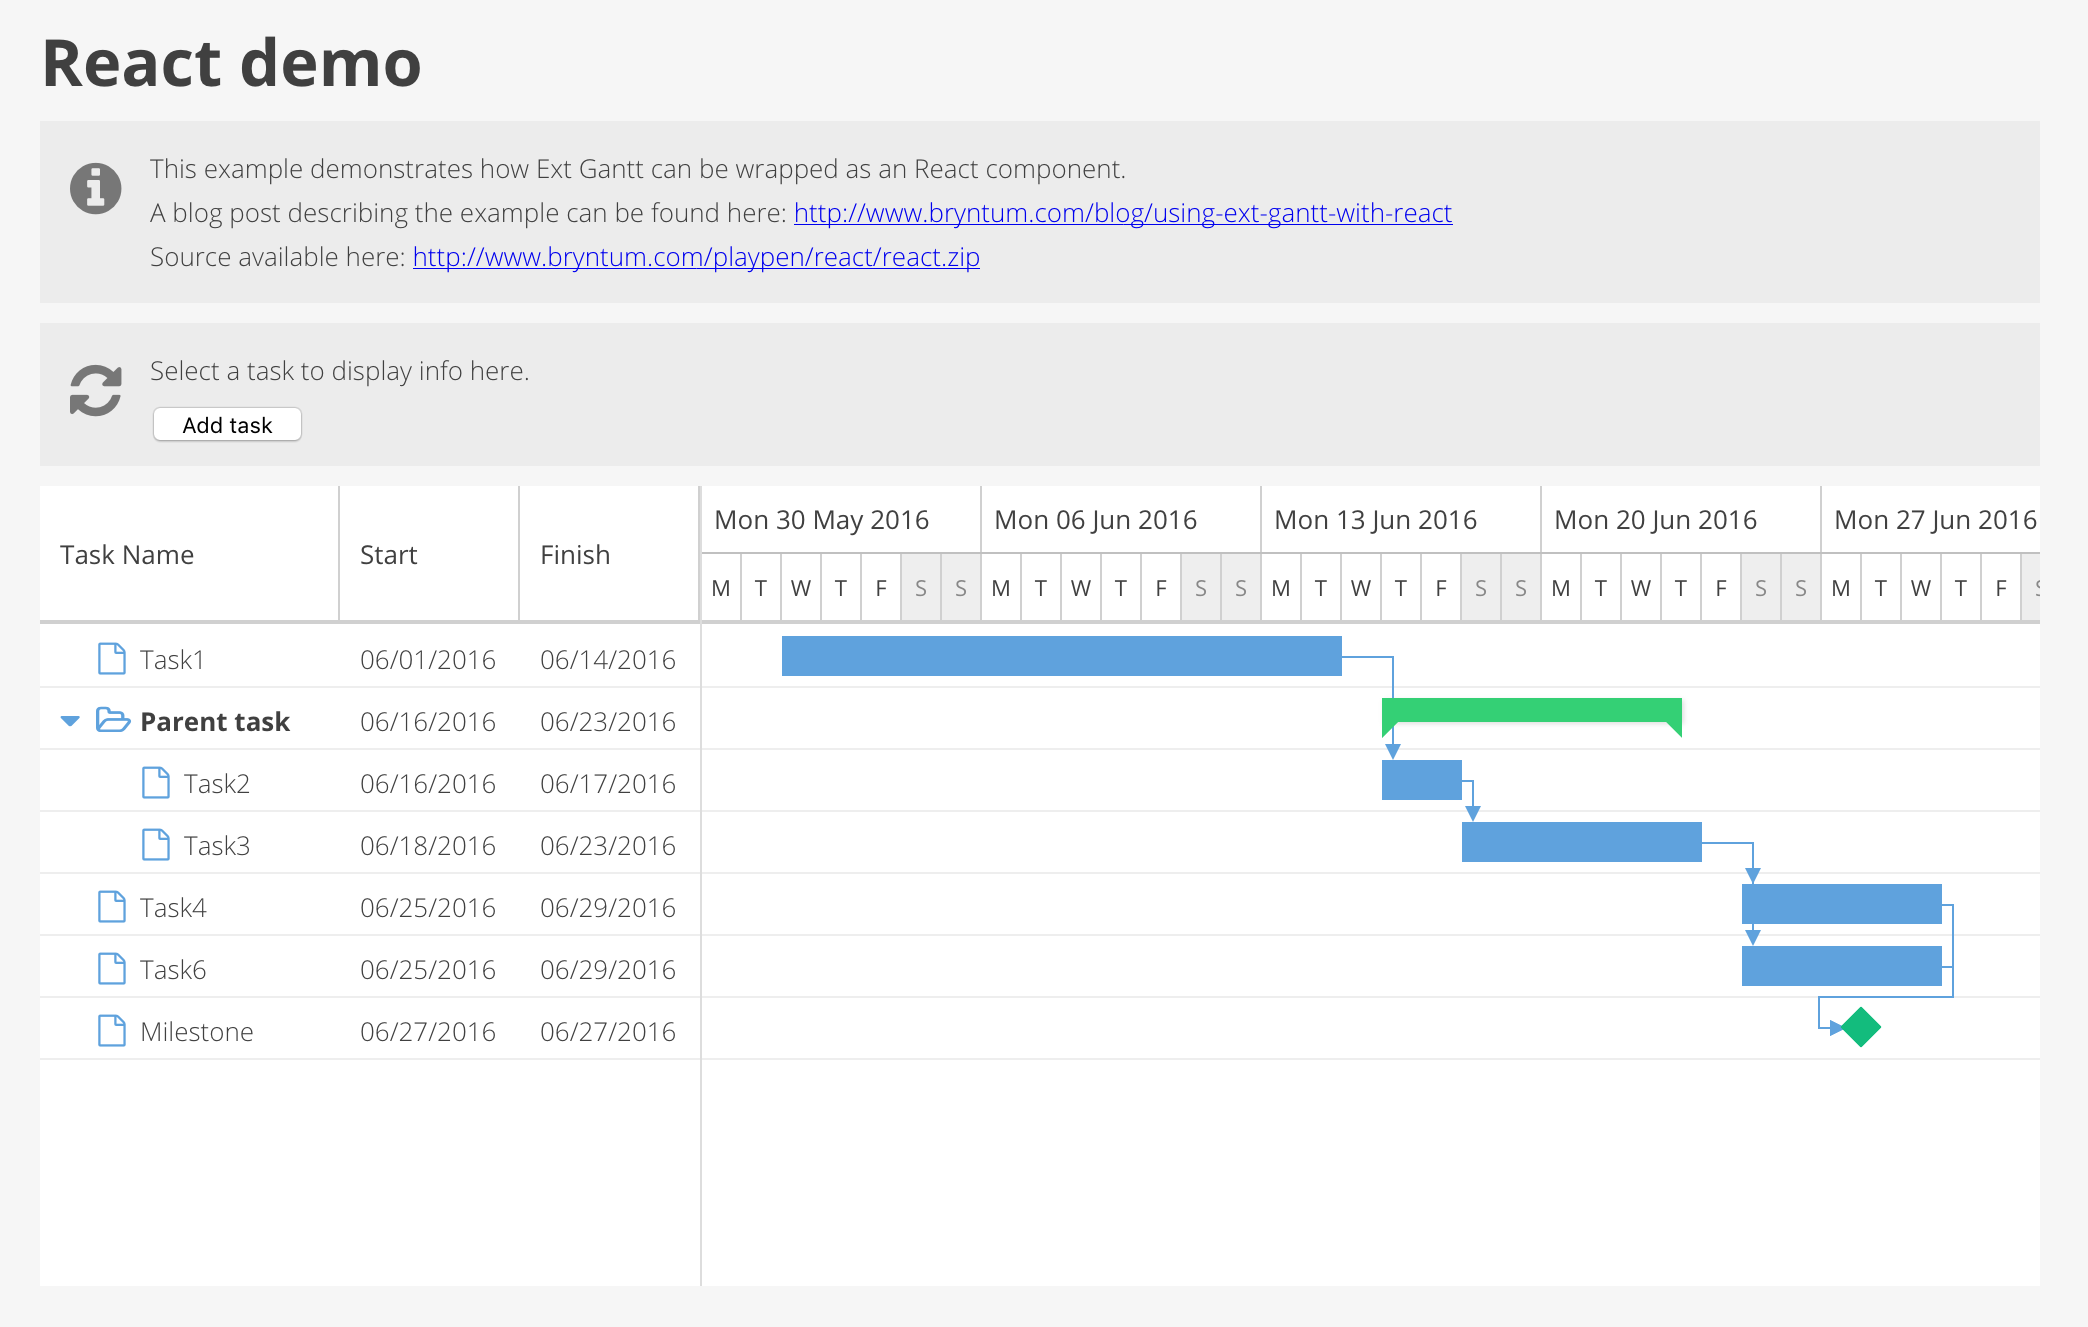
GanttDemoApp is a React component that at this point only contains a Gantt component (our gantt chart). It is rendered to the page using ReactDom.render(). If you open the index.html file in a browser on a web server, you should see the following:
Configuration using Props
All settings in the Gantt component above are hard coded. In React you use Props to allow components to be configured from the outside. Let’s add a few simple Props to the Gantt component, you can of course add more later. First add the following to the top of the Gantt component, just below React.createClass():
propTypes : {
    id              : React.PropTypes.string.isRequired,
    taskUrl         : React.PropTypes.string.isRequired,
    dependenciesUrl : React.PropTypes.string.isRequired,
    preset          : React.PropTypes.string
},
The Props with isRequired at the end have to be specified by the user when using the component, others are optional. Now we use the Props as settings in the gantt chart by changing the following lines:
// in componentDidMount():
url : 'data/tasks.json'
url : 'data/dependencies.json'
viewPreset : 'weekAndDayLetter'
renderTo : 'gantt'

// in render():
<div id="gantt"></div>
To:
// in componentDidMount():
url : this.props.taskUrl
url : this.props.dependenciesUrl
viewPreset : this.props.preset
renderTo : this.props.id

// in render():
<div id="{this.props.id}"></div>
Props can now be set on our Gantt tag to easily configure the component. Change the tag to:
<Gantt
    // props used to configure the gantt chart
    id="gantt1"
    taskUrl="data/tasks.json"
    dependenciesUrl="data/dependencies.json"
    preset="weekAndDayLetter">
</Gantt>
Interacting with the Gantt component
We are going to try two kinds of interactions:
- Relaying events from the gantt chart to React
- Exposing functions on our React component
Relaying events
Ext Gantt is based on ExtJS that has its own event system. We want to be able to take action on those events in our React app and therefore need to relay them somehow. A simple solution is to use callbacks as Props and then call them from an internal event listener. Lets try it out, add the following listener to the bottom of the config object in componentDidMount() in Gantt:
listeners : {
    taskclick : (gantt, taskRecord) => {
        this.props.onTaskSelect && this.props.onTaskSelect(taskRecord);
    }
}
What we added is an event listener for the gantt chart event taskclick. When the event is fired we check if we have a callback (onTaskSelect()) in Props and the call it with information about the task that was clicked. Now add the prop to the React apps Gantt tag (in bold below) and a function to handle the event to the app (also in bold):
var GanttDemoApp = React.createClass({
    handleTaskSelect: function(taskRecord) {
          // clicking a task in the gantt chart shows an alert with its name
          alert(taskRecord.get('Name'));
    },

    render : function() {
        return (
            <Gantt
                // props used to configure the gantt chart
                id="gantt1"
                taskUrl="data/tasks.json"
                dependenciesUrl="data/dependencies.json"
                preset="weekAndDayLetter">
                onTaskSelect={this.handleTaskSelect} />
            </Gantt>
        );
    }
});
Exposing functions
When creating the Gantt component we stored the gantt chart in the React state, which we can access from the outside to manually reach Ext Gantt member functions. But a better approach is to add functions to the Gantt component which does that for us, making it easier to use. As an example let’s add a function to add new tasks, put the following code before render() in the Gantt component:
// can be called from parent component to add a new task
addTask : function() {
    this.state.widget.getTaskStore().getRoot().appendChild({
        Name: 'New task',
        leaf: true
    });
},
To be able to access it from our React app we are going to add a ref to the Gantt component. Refs give us easy access to child components. At the same time let’s add a button to trigger the function. Modify the tag to match this (new in bold):
<b><button>Add new task</button></b>
<Gantt
   // props used to configure the gantt chart
   id="gantt1"
   ref="gantt1"
   taskUrl="data/tasks.json"
   dependenciesUrl="data/dependencies.json"
   preset="weekAndDayLetter">
   onTaskSelect={this.handleTaskSelect} />
</Gantt>
Now add a handleAddClick() method to the React app, above the render method :
handleAddClick: function() {
    this.refs.gantt1.addTask();
},
That’s it, clicking the button calls handleAddClick() which uses refs to get the instance of the Gantt component and then calls addTask() on it.
Taking it further
Please download the example and check the source to see some more Props and also how to create a Column component used as a child to our Gantt component for configuring which columns to show. Feel free to extend it with the Props, events and functions you need for your app.
View live example: /products/gantt/examples-latest/examples/react/
Download source: /playpen/react/react.zip
Learn about React: https://facebook.github.io/react/
Happy coding!