Adding A Scheduler Component To Your React App
 React (also known as React.js or ReactJS) is a JavaScript library for building user interfaces. It is maintained by Facebook and a community of individual developers and companies. React makes it easier to create interactive views that react to changes in data and update accordingly.
Views implemented as components makes code more predictable and easier to debug and they encapsulate and manage their own state. Since component logic is written in JavaScript instead of templates, you can easily pass rich data through your app and keep state out of the DOM.
The React paradigm is that “everything is JavaScript” and that the JavaScript generates the HTML that is necessary to visualize the components. The generated markup is automatically updated based on the logic programmed in the components.
React does not ship with rich UI components such as grid, tree, form elements, graphs or similar so the React developer often has to resort to incorporating 3rd party widgets, such as the Bryntum component suite.
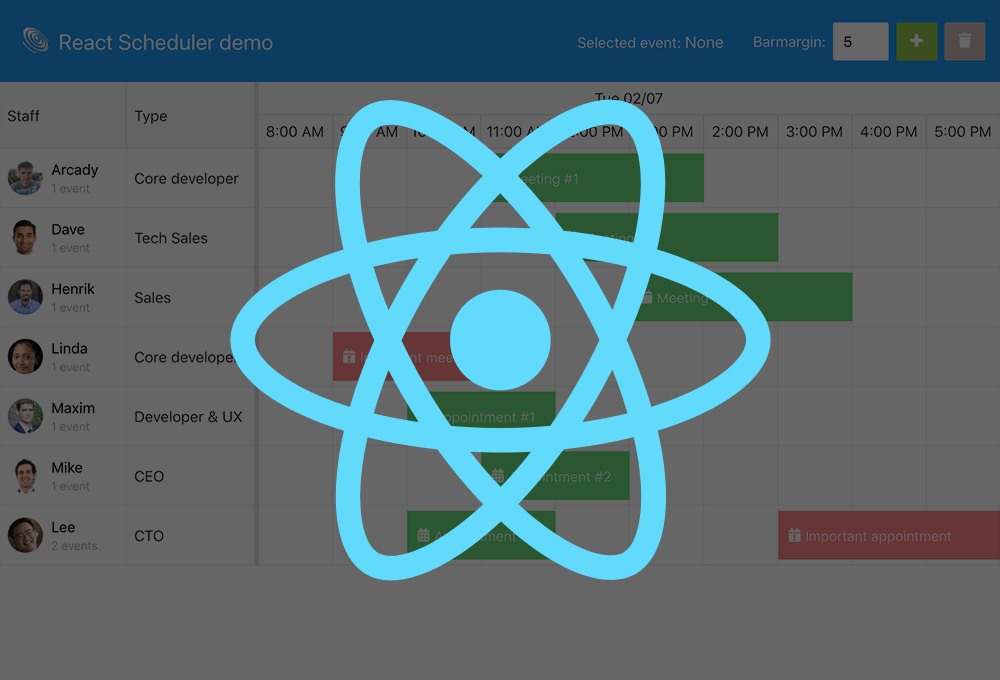
This article will describe how to use Bryntum Scheduler in a React application.
Important Note
Success in implementing the example described in this article requires a dedicated effort of the reader to understand explanations and the related code. Also, don’t slip into heedless “copy & paste development” but always try to understand the currently executed step. In many cases it is only necessary to know what a component or function does and we don’t need to know how it does it. We are also very willing to assist you in our forums in case you can’t find an adequate answer elsewhere.
Bryntum Scheduler in React
The Bryntum Scheduler itself is framework agnostic, but it ships with demos and wrappers to simplify using it with popular frameworks such as React. The purpose of this guide is to give you a basic introduction on how to use Scheduler with React.
The Scheduler ships with plenty of React demos which run either in development mode or can be built for production. They are located in the `examples/frameworks/react/[javascript|typescript]` folder. The demos are ready for direct viewing (in production mode) here: React Integration Examples.

The React demos have been created using create-react-app script so that they can be run locally by running `npm start` in their respective directories, or they can be built for production by running `npm run build`.
The examples use our React wrappers that are shipped as npm packages (`@bryntum/scheduler-react`). The wrappers are React components that use their Bryntum counterparts as the internal engine. For example, `BryntumScheduler` is a React component that uses (wraps) `Scheduler`.
The wrappers encapsulate Bryntum Scheduler and other Bryntum widgets in React components that expose configuration options, properties, features and events. The wrapped Bryntum components are then used the usual React way.
Although it is possible to use Bryntum Scheduler without wrappers, this technique is not recommended nor supported. The wrappers are auto-generated from the source code, provide access to full API and they contain additional logic that implements sanity checks and React component renderers. It is much easier to use the wrappers than to write the necessary logic in the application.
Bryntum npm repository
Bryntum components are commercially licensed products and hence they are hosted in a private Bryntum repository and you need to login to access them. The repository at https://npm.bryntum.com greets you with the `@bryntum/welcome` package which contains detailed login instruction both for trial and licensed users.
The login instructions can also be found in the Npm Repository Guide at the Scheduler documentation site.
Installing the Bryntum npm packages
All published packages in the private Bryntum npm repository can be installed like any other regular npm packages. For example, the React integration it can be done with:
Installing using npm:
$ npm install @bryntum/demo-resources
$ npm install @bryntum/scheduler
$ npm install @bryntum/scheduler-react
or adding using yarn:
$ yarn add @bryntum/scheduler
$ yarn add @bryntum/scheduler-react
or adding entries to "dependencies in package.json project file:
"dependencies": {
    "@bryntum/scheduler": "4.2.3",
    "@bryntum/scheduler-react": "4.2.3"
}
We recommend to remove the caret character (`^`) from the versions to take upgrades fully under control.
Note: To avoid compatibility issues make sure that you use same version for all installed Bryntum product packages.
The detailed installation instructions, including the instructions for trial users, can be found in the Npm Repository Guide.
Using the wrapper
The wrapper defines a React component named BryntumScheduler. You can use it the same way as you would use other React components. For example:
Sample code for App.js:
import React from 'react';
import { BryntumScheduler } from '@bryntum/scheduler-react';
import { schedulerConfig } from './AppConfig.js'

export const App = () => {
    return (
        <BryntumScheduler
            {...schedulerConfig}
            // other props, event handlers, etc
        />
    );
}
Sample code for AppConfig.js:
export const schedulerConfig =  {
    tooltip : "My cool Scheduler component",
    // other scheduler config options
};
Embedding widgets inside wrapper
Wrappers are designed to allow using Bryntum widgets as React components, but they themselves cannot contain other Bryntum wrappers inside their tag. To embed Bryntum widgets inside a wrapper you should instead use the available configuration options for the wrapper’s widget. Please note that not all widgets may contain inner widgets, please refer to the API docs to check for valid configuration options.
This example shows how to use a Toolbar widget inside the wrapper for Bryntum scheduler:
Sample code for AppConfig.js:
export const schedulerConfig =  {
    // Toolbar (tbar) config
    tbar: {
        items : [
            {
                type : 'button',
                text : 'My button'
            }
        ]
    }
    // scheduler config options
};
Supported options
All Bryntum React Wrappers support the full set of the public configs, properties and events of a component.
Listening to BryntumScheduler events
The conventional React way is used to listen to Scheduler events. For example, if we want to listen to selectionChange event we pass the listener function to onSelectionChange property. The property name must be camel case and is case sensitive.
const selectionChangeHandler = useCallback(({ selection }) => {
    console.log(selection); // actual logic comes here
});

// ...

return (
    <BryntumScheduler
        onSelectionChange={selectionChangeHandler}
        // other properties
    />
)
You can find details of all events that are fired by BryntumScheduler in the API documentation.
The Native Bryntum Scheduler Instance
It is important to know that the React component that we sometimes refer to as the “scheduler” is not the native Bryntum Scheduler instance, it is a wrapper or an interface between the React application and the Bryntum Scheduler itself.
The properties and features are propagated from the wrapper down to the underlying Bryntum Scheduler instance but there might be the situations when you want to access the Bryntum Scheduler directly. That is fully valid approach and you are free to do it.
Accessing the Bryntum Scheduler instance
If you need to access Scheduler instance, you can do like this:
const schedulerRef = useRef();

useEffect(()=>{
  // the instance is available as
  console.log(schedulerRef.current.instance);
},[])

return <BryntumScheduler ref={schedulerRef} {...schedulerConfig} />
Using Bryntum Scheduler themes
For the scheduler styling you must also import a CSS file that contains a theme for Bryntum Scheduler. There are two main ways of importing the theme.
Using single theme
The easiest way is to import the CSS file in your App.js or in App.scss.
In App.js you would import one of the following:
import '@bryntum/scheduler/scheduler.classic-dark.css';
import '@bryntum/scheduler/scheduler.classic-light.css';
import '@bryntum/scheduler/scheduler.classic.css';
import '@bryntum/scheduler/scheduler.material.css';
import '@bryntum/scheduler/scheduler.stockholm.css';
The syntax is slightly different in App.scss; use one of the following:
@import '~@bryntum/scheduler/scheduler.classic-dark.css';
@import '~@bryntum/scheduler/scheduler.classic-light.css';
@import '~@bryntum/scheduler/scheduler.classic.css';
@import '~@bryntum/scheduler/scheduler.material.css';
@import '~@bryntum/scheduler/scheduler.stockholm.css';
Note: Importing theme in App.scss file is recommended because this way we keep all styling-related code together in one file.
Selecting from multiple themes
Theme switching can be implemented with the help of the <BryntumThemeCombo /> component. It has to be imported as any other component before it is used, for example:
import { BryntumThemeCombo, } from '@bryntum/scheduler-react';

// ... other code

return (
    // ... other components
    <BryntumThemeCombo />
    // ... other components
);
CSS and fonts files that contain themes must be accessible by the server in any subdirectory of the public server root in themes and themes/fonts. The easiest way of putting them there is to copy the files automatically during postinstall process in package.json:
  "scripts": {
    "postinstall": "postinstall"
  },
  "postinstall": {
    "node_modules/@bryntum/scheduler/*.css": "copy public/themes/",
    "node_modules/@bryntum/scheduler/fonts": "copy public/themes/fonts"
  },
  "devDependencies": {
    "postinstall": "~0.7.0"
  }
},
Note: use npm install --save-dev postinstall to install the required postinstall package or add it manually to package.json.
The last part is to add the default theme link to the head of public/index.html:
<head>
  <link
    rel="stylesheet"
  	href="%PUBLIC_URL%/themes/scheduler.stockholm.css"
  	id="bryntum-theme"
  />
</head>
“`
Note: id="bryntum-theme" is mandatory because BryntumThemeCombo relies on it.
Note: If you adjust location of themes and fonts, adjust it in both package.json and in index.html, for example my-resources/themes/ and my-resources/themes/fonts. No other configuration is needed.
Further reading
- For more information on React integration see the React integration guide. It always contains the most complete up-to-date information.
- For more information on config options, features, events and methods consult please the API docs
- For more information on React see the React docs
- For more information on the Create React App scripts see the documentation
- If you have any questions related to the integration or the Scheduler itself you can always ask me or my colleagues in our forums