Using Ext Gantt & Scheduler 4.x with Sencha Cmd
Lately we have received a few questions from our community on how to use the shipped Bryntum packages with Sencha Cmd. For a while now, both the Gantt and Scheduler distributions ship with ready to use Sencha Cmd packages. They are located in the “packages” sub-folder inside each file archive. To use the packages in your application you need to execute two basic steps:
- 1. Install the packages.
- 2. Configure your application to use them.
Installing the packages
To do this you need to proceed to the “packages” sub-folder and install the “*.pkg” files by running the following command:
sencha package add *.pkg
Note: as an alternative, you can manually create folders for every pkg-file in the “packages” folder of the workspace the application belongs to (if you use a workspace), or in the “packages” folder of the application. Simply unzip the pkg-files into the created folder. Make sure the folder names match package names. For example, if you’re installing “bryntum-gantt-pro.pkg” you need to create a “bryntum-gantt-pro” folder and unpack “bryntum-gantt-pro.pkg” contents there.
Configure an application to use packages
After the packages are installed, you need to configure your application to use them. To do this you need to edit the application “app.json” file and add the package names to the “requires” section.
This is how it might look for the Gantt Pro:
{
            "name" : "MyApp",
            "theme": "ext-theme-neptune",

            ...

            "requires" : [
                // the gantt and its theme
                "bryntum-gantt-pro",
                // since the application uses extjs neptune theme
                // we use corresponding theme package for the gantt
                "bryntum-gantt-pro-neptune"
            ],

            ...
        }
Universal applications
Please note that if your application is universal (made to support both “classic” and “modern” Sencha toolkits), you need to add the packages to the “requires” section in the “classic” section. Since our Cmd packages only support the “classic” toolkit at the moment, this is how you should configure a universal app:
/**
     * Settings specific to classic toolkit builds.
     */
    "classic": {
        "requires": [
            // the gantt and its theme
            "bryntum-gantt-pro",
            // since the application uses extjs neptune theme
            // we use corresponding theme package for the gantt
            "bryntum-gantt-pro-neptune"
        ],
        ...
Theming note
In the above “app.json” snippets, the “bryntum-gantt-pro-neptune” package provides “Neptune” ExtJS theme support for the Gantt Pro. It is not a real Sencha Cmd theme, this is why it’s added to the “requires” and not to the “theme” option.
At the moment four ExtJS themes are supported: “Classic”, “Neptune”, “Crisp” and “Triton” – simply pick the corresponding package for the theme you want to use.
Launching the application
After the above two steps your application can be launched in development mode by running the following command from the application folder:
sencha app watch
And checking how it looks in your browser: https://localhost:1841/your-application-name/
Using a trial version with Sencha Cmd
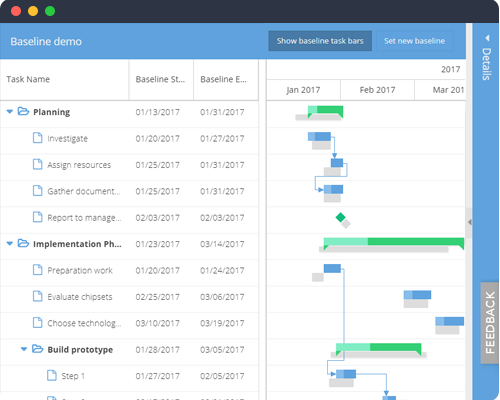
Our trial version doesn’t include a Sencha Cmd package. So to use our trial with Sencha Cmd you need to use another approach. Here is a short description on how to turn the advanced example shipped with the Gantt Pro trial into a Sencha Cmd application.
Downloading the Bryntum trial pack
First you need to download the Bryntum trial archive from the Bryntum website. Then just unpack it to a temporary folder. The trial archive has three sub-folders:
- – gantt-4.*-trial
- – gantt-pro-4.*-trial
- – scheduler-4.*-trial
Note: From here on, “trial folder” refers the Gantt Pro folder (“gantt-pro-4.*-trial”).Proceed to the workspace folder and create an application:
sencha generate app -classic -ext Gnt.examples.advanced advanced
Where Gnt.examples.advanced is the real namespace used in the advanced example code.
Copying the example content
We’re almost there, now we need to copy the advanced example content into the generated app by following these steps:
- 1. Remove the new application “app” folder and “app.js” file (we already have them in the advanced example).
- 2. Copy the “app” folder and “app.js” file from the “example/advanced” folder inside the trial folder.
- 3. Copy the dummy example data file “load.json” from the “example/advanced/data” folder in the trial folder to the application “resources” folder.
- 4. Edit the “app/crud/CrudManager.js” file (in the application folder) to use the new “load.json” location:
- 5. Copy the example stylesheets. To do this, copy the example “resources” folder to the application folder. And edit “app.json” and add this info to “css” section:
load : {
    method      : 'GET',
    paramName   : 'q',
    url         : 'resources/load.json'
},
{
    "path": "resources/app.css"
}
Adding the Gantt chart to the application
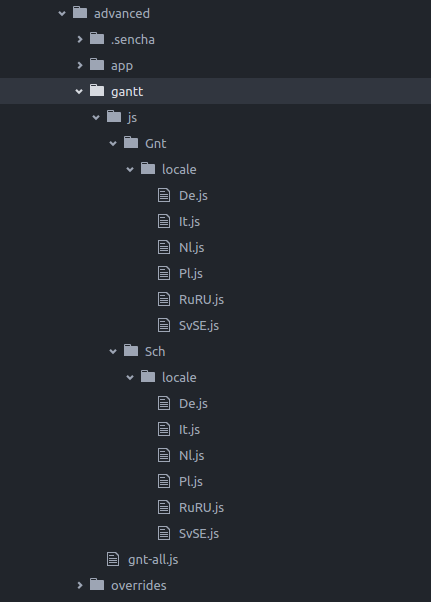
1. In the new application folder, create a “gantt” sub-folder. Copy “gnt-all.js” and the “js” folder from the trial folder into it. The “gantt” folder will now have the following look:
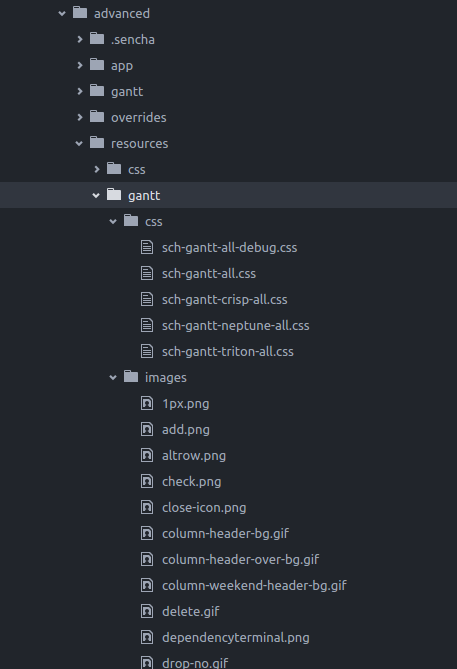
2. In the new application folder, proceed to the “resources” folder and create a “gantt” sub-folder there. Copy “resources/css” and “resource/images” folders from the trial folder to that folder. The “resources” folder will now have the following content:
3. Now we need to let Sencha Cmd know of the location of the Gantt classes. To do this edit “app.json” file and add a “gantt” sub-folder to its “classpath” section:
"classpath": [
        "app",
        "gantt"
    ],
4. We also need to let Sencha Cmd know where to get the Gantt stylesheets. To do this edit the “app.json” file. Modify its “css” section this way:
{
    "path": "resources/gantt/css/sch-gantt-triton-all.css"
}
Note: you should add this stylesheet before the example one (to make sure the application specific styles always “win”). Here is an example of how the “css” section might look:
"css": [
            {
                // this entry uses an ant variable that is the calculated
                // value of the generated output css file for the app,
                // defined in .sencha/app/defaults.properties
                "path": "${build.out.css.path}",
                "bundle": true,
                "exclude": ["fashion"]
            },
            {
                "path": "resources/gantt/css/sch-gantt-triton-all.css"
            },
            {
                "path": "resources/app.css"
            }
        ],
After the above steps the application should start working in development mode. Try it by launching this command in the application folder:
sencha app watch
Now you can open this in your browser and see how it looks by visiting https://localhost:1841/advanced/