Tips ‘n Tricks: Rendering Meta Data In The Timeline Header
Today we released new versions of Ext Scheduler and Ext Gantt. As part of the new scheduler release, we updated two of the examples to show off some cool header rendering tricks. In our mail inbox, one common question we get is “How do I render a summary in the timeline header?”. This question can now be easily answered by checking out these samples.
Rendering text into the timeline header
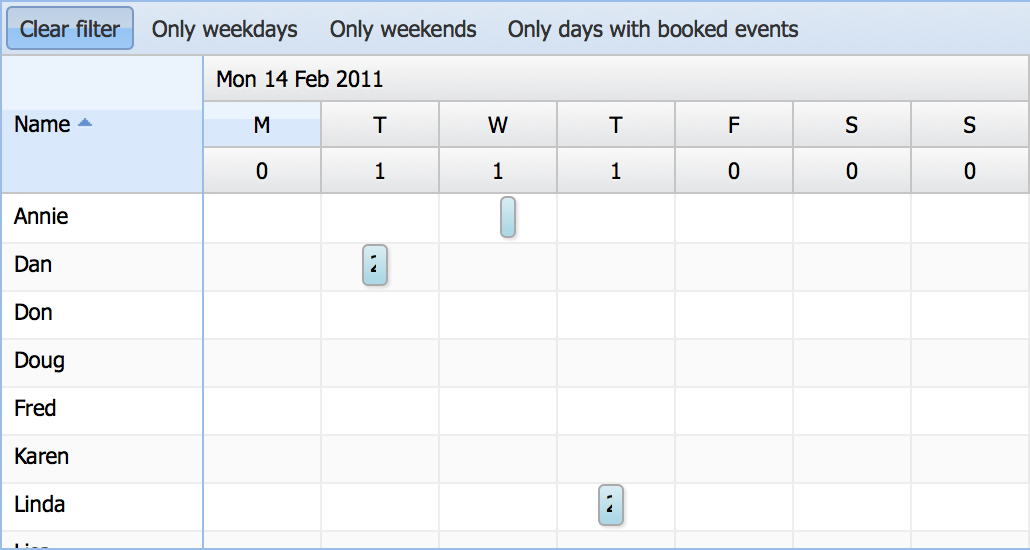
Let’s say you want to show some type of summary showing how many tasks exist for each day in the schedule. To do this, all you have to do is to create a custom view preset and devote the bottom row to rendering your summary. Here’s how you create and register a new custom preset which produces the output in the image above (from the updated ‘timeaxis‘ sample):
[crayon striped=”false” lang=”js” nums=”false” toolbar=”false”]
Sch.preset.Manager.registerPreset(‘weekWithSummary’, {
timeColumnWidth : 20,
rowHeight : 24,
resourceColumnWidth : 100,
displayDateFormat : ‘Y-m-d’,
shiftUnit : ‘WEEK’,
shiftIncrement : 1,
defaultSpan : 10,
timeResolution : {
unit : “HOUR”,
increment : 6
},
headerConfig : {
bottom : {
unit : ‘DAY’,
align : ‘center’,
renderer : function (start, end, config, index, eventStore) {
return eventStore.getEventsInTimeSpan(start, end).length;
}
},
middle : {
unit : ‘DAY’,
align : ‘center’,
renderer : function (start) {
return Ext.Date.dayNames[start.getDay()].substring(0, 1);
}
},
top : {
unit : ‘WEEK’,
dateFormat : ‘D d M Y’
}
}
});
[/crayon]
As of the latest release, you now have access to the eventStore of the panel where the header is being rendered. This makes it really easy to do summaries like this. As you can see in the code snippet above, all we do is to query the eventStore based on the header cell start/end dates.
Rendering event bars into the timeline header
We recently had a request to draw event bars in the header. This requires a little more work but is still really simple to achieve. Here’s an image showing the desired output (part of the new ‘columnsummary‘ sample).
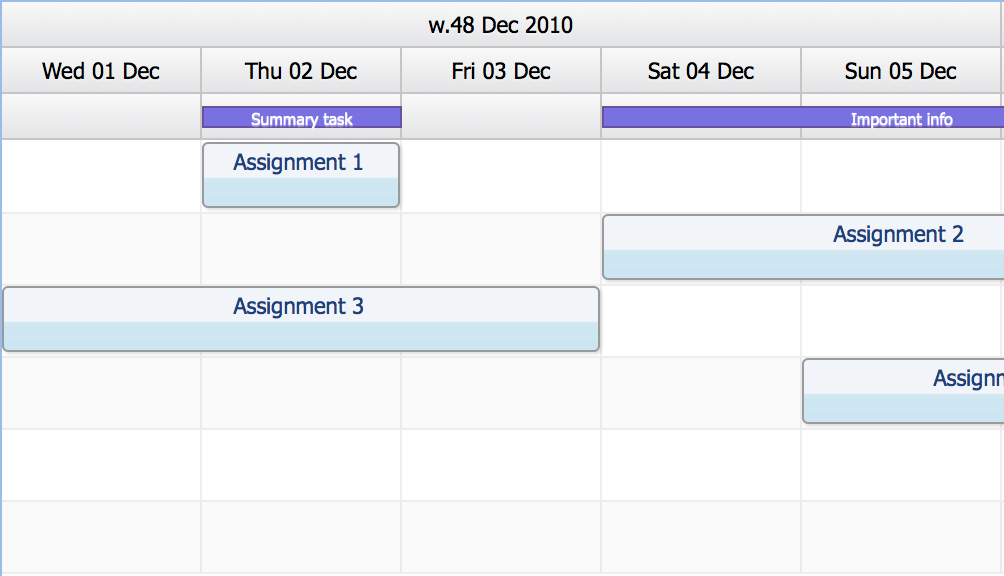
Since we’re now trying to render time dependent data (i.e. it depends on the timeline visualization), we have to get access to the scheduler view which has APIs to get the position based on a date. First we create a new view preset with an empty bottom row renderer.
[crayon striped=”false” lang=”js” nums=”false” toolbar=”false”]
Sch.preset.Manager.registerPreset(“dayWeek”, {
timeColumnWidth : 100,
rowHeight : 24,
resourceColumnWidth : 100,
displayDateFormat : ‘Y-m-d G:i’,
shiftUnit : “DAY”,
shiftIncrement : 1,
defaultSpan : 5,
timeResolution : {
unit : “HOUR”,
increment : 1
},
headerConfig : {
bottom : {
unit : “DAY”,
renderer : null // set in scheduler initialization
},
middle : {
unit : “DAY”,
align : ‘center’,
dateFormat : ‘D d M’
},
top : {
unit : “WEEK”,
align : ‘center’,
renderer : function (start, end, cfg) {
return Sch.util.Date.getShortNameOfUnit(“WEEK”) + ‘.’ + Ext.Date.format(start, ‘W M Y’);
}
}
}
});
[/crayon]
We also need some data to show in the header. In the sample data, I added some events with a special ‘frozen’ ResourceId set. Here’s the data set loaded:
[crayon striped=”false” lang=”js” nums=”false” toolbar=”false”]
eventStore : Ext.create(“Sch.data.EventStore”, {
data : [
{Id : ‘e10’, ResourceId : ‘r1’, Name : ‘Assignment 1’, StartDate : “2010-12-02”, EndDate : “2010-12-03”},
{Id : ‘e11’, ResourceId : ‘r2’, Name : ‘Assignment 2’, StartDate : “2010-12-04”, EndDate : “2010-12-07”},
{Id : ‘e21’, ResourceId : ‘r3’, Name : ‘Assignment 3’, StartDate : “2010-12-01”, EndDate : “2010-12-04”},
{Id : ‘e22’, ResourceId : ‘r4’, Name : ‘Assignment 4’, StartDate : “2010-12-05”, EndDate : “2010-12-07”},
{Id : ‘e32’, ResourceId : ‘r5’, Name : ‘Assignment 5’, StartDate : “2010-12-07”, EndDate : “2010-12-11”},
{Id : ‘e33’, ResourceId : ‘r6’, Name : ‘Assignment 6’, StartDate : “2010-12-09”, EndDate : “2010-12-11”},
{Id : ‘special1’, ResourceId : ‘frozen’, Name : ‘Summary task’, StartDate : “2010-12-02”, EndDate : “2010-12-03”},
{Id : ‘special2’, ResourceId : ‘frozen’, Name : ‘Important info’, StartDate : “2010-12-04”, EndDate : “2010-12-07”},
{Id : ‘special3’, ResourceId : ‘frozen’, Name : ‘Some text’, StartDate : “2010-12-08”, EndDate : “2010-12-09”}
]
})
[/crayon]
In our scheduler, I defined a simple XTemplate rendering a simple DIV for each bar.
[crayon striped=”false” lang=”js” nums=”false” toolbar=”false”]
this.headerTpl = new Ext.XTemplate(‘
‘);
[/crayon]
Then I grab the bottom header row of my custom preset and set a new renderer method which renders these special ‘frozen’ header events.
[crayon striped=”false” lang=”js” nums=”false” toolbar=”false”]
Sch.preset.Manager.get(‘dayWeek’).headerConfig.bottom.renderer = Ext.Function.bind(this.frozenHeaderRenderer, this);
[/crayon]
Now all we have to do is to write the rendering part, by implementing our frozenHeaderRenderer method. We inject all these events in the first header cell, since the getXFromDate method returns values based on the left-most edge of the view.
[crayon striped=”false” lang=”js” nums=”false” toolbar=”false”]
// Render some special ‘frozen’ header events which are always shown in the header.
frozenHeaderRenderer : function (start, end, cfg, i, eventStore) {
var me = this;
if (i === 0) {
var eventsInSpan = eventStore.queryBy(function (task) {
return task.getResourceId() === ‘frozen’ && me.timeAxis.timeSpanInAxis(task.getStartDate(), task.getEndDate());
});
var tplData = Ext.Array.map(eventsInSpan.items, function (task) {
var startX = me.getSchedulingView().getXFromDate(task.getStartDate());
var endX = me.getSchedulingView().getXFromDate(task.getEndDate());
return {
left : startX,
width : endX – startX,
text : task.getName()
}
});
return me.headerTpl.apply(tplData);
}
}
[/crayon]
Keeping the header up to date
The last piece of this puzzle is to make sure the header view is up to date. We do this by simply observing the event store for any changes. When events are added to the eventStore, we simply call ‘refresh’ on the TimeAxisColumn instance.
[crayon striped=”false” lang=”js” nums=”false” toolbar=”false”]
var timeAxisColumn = this.down(‘timeaxiscolumn’);
this.eventStore.on({
add : timeAxisColumn.refresh,
remove : timeAxisColumn.refresh,
update : timeAxisColumn.refresh,
scope : timeAxisColumn
});
[/crayon]
That’s all it takes. One custom preset, a template and data to apply to the template. I hope you find these tricks useful as you customize your own Scheduler and Gantt components.