Adding A Powerful Gantt Chart To A SharePoint Site

In the recent months we have received multiple requests for a guide showing how to embed our components into a Microsoft SharePoint site. We are happy to announce that we have created a guide and a new example in the format of a Visual Studio Solution, showing how to create a basic SharePoint add-in for our Gantt component.
With this solution as a base you can deploy any of our components to your SharePoint Site and map it to any data source in your SharePoint domain.
We have created a small Ext JS based proxy for this purpose. This proxy is able to perform CRUD operations. This will allow you to populate the deployed chart with any data and you are able to save changes by using it’s configured proxies. The proxy could be used for any data source in SharePoint, like for example resources and items from any list.
A few prerequisites…
Before you start, make sure you have gone through the list below to get you setup:
- Having Visual Studio installed with Sharepoint project templates.
- A Sharepoint Developer Site, optionally combined with an App Catalog Site in which you can deploy your packages. Or an installed SharePoint server on a local or remote machine (Microsoft has some pre-installed Azure images for this purpose, they are freely available when you have a Microsoft Developer Account). For our demo, we used a Microsoft Office 365 Business Premium account. This link would be a good entry point to set it up.
- Within our product, in this case the Ext Gantt Pro package, which you have copied to your locale machine, you will find the SharePoint solution in the `examples/sharepoint` folder. All instructions to set it up are explained and included in the guide section of the docs
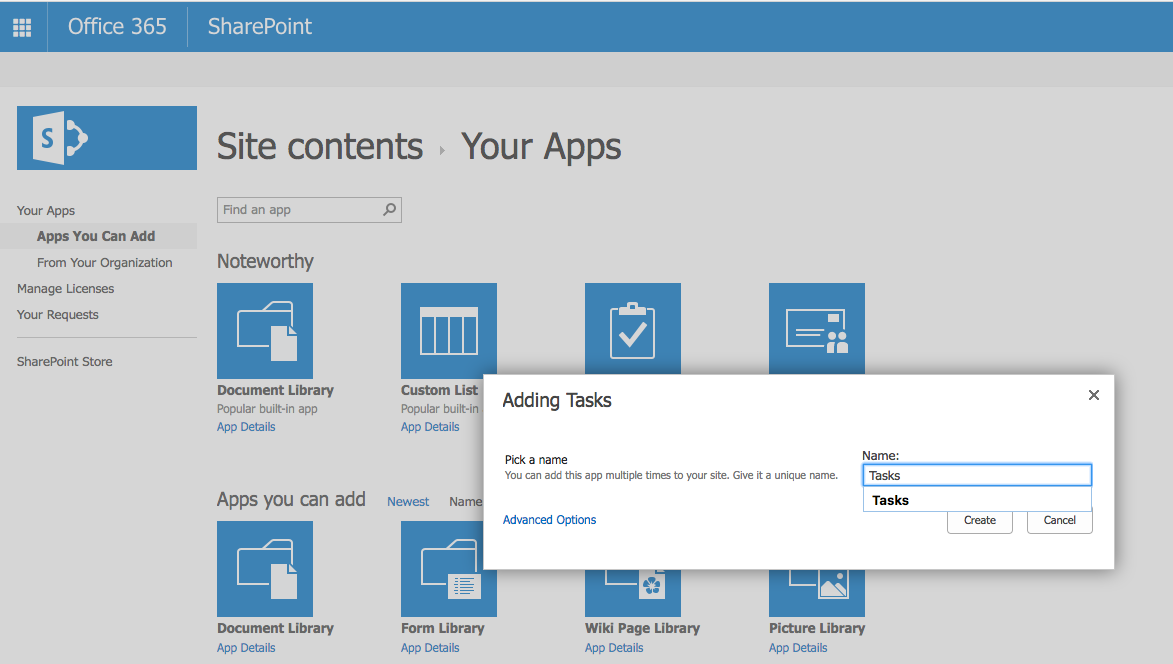
- And at last you need some data from a list in your SharePoint domain. In our setup we used the default Task app which you can add to your SharePoint Site
The Solution
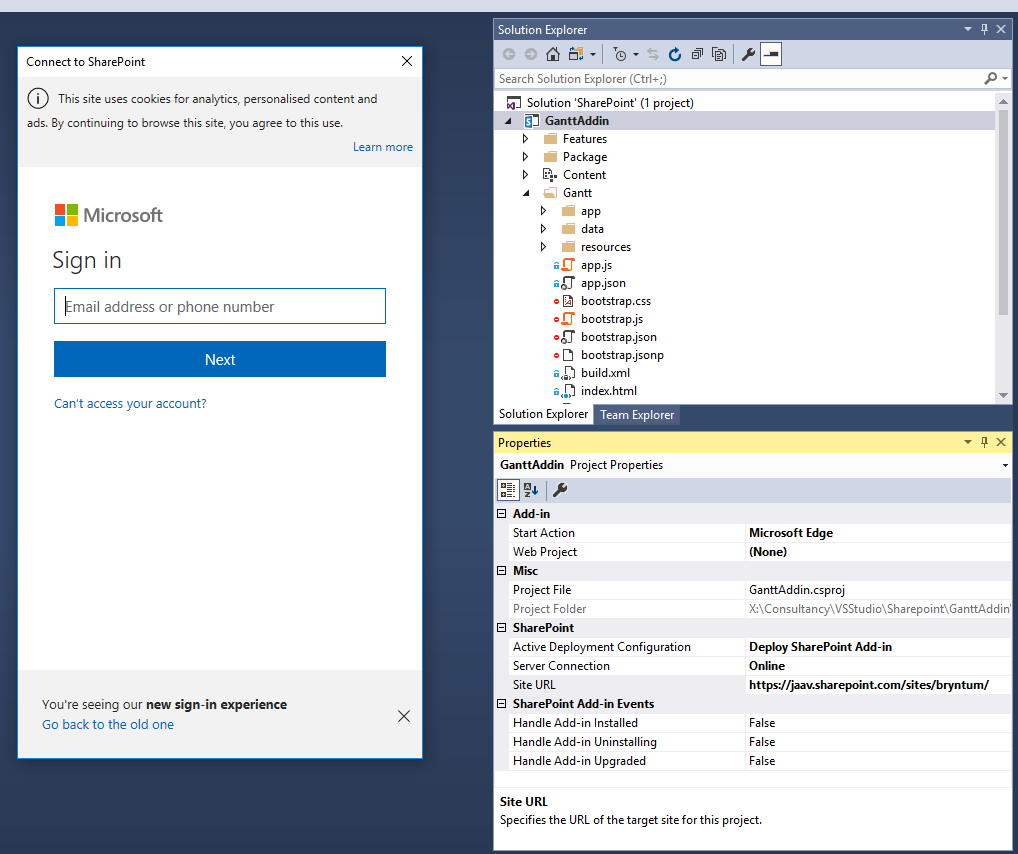
When you open the solution in Visual Studio, start by adding your SharePoint Developer Site to the project and log in to the site.
Booting the site up
In the `Default.aspx` page we have embedded our Ext JS application. There we add the RestBatchExecutor for making CRUD operations in Sharepoint. This BatchExecutor is created by Steve Curran and is a very easy library to use for handling multiple updates in a single request via the ODATA protocol.
<script type="text/javascript" src="../Scripts/RestBatchExecutor.js"></script>
Then we add the microloader.
<script id="microloader" data-app="5b8dd3ff-bbc3-4020-af48-6f8b54ee24e9" src="./Gantt/microloader.js"></script>
And we set the placeholder to where the chart is rendered to.
<div id="ganttplaceholder" class="scheduler">
</div>
Application classes
We have `app.js` and `view/Application.js` as application classes which will boot up the application.
app.js
launch: function () {
    window.ExecuteOrDelayUntilScriptLoaded(this.loadRequestExecutor.bind(this), "sp.js");
}
Within the SharePoint scope we have to load `RequestExecutor.js`, before rendering the application, to be able to make REST api endpoint calls within the SharePoint domain.
loadRequestExecutor : function (){
    this.hostWebUrl = this.getParameterByName("SPHostUrl");
    this.appWebUrl = this.getParameterByName("SPAppWebUrl");
    $.getScript(this.hostWebUrl + "/_layouts/15/SP.RequestExecutor.js", this.initializeApp.bind(this));
}
When the `RequestExecutor` is loaded we are at the stage we can launch our main view.
view/Application.js
initializeApp: function () {

    this.chart = new SPGnt.view.main.Main({
        renderTo: 'ganttplaceholder',
        height     : '100%',
        width      : '100%',
        taskStore : {
            type        : 'gantt_sptasks',
            autoSync    : true,
            proxy: {
                type        : 'spproxy',
                api: {
                    create  : "web/Lists/getbytitle('Tasks')/items",
                    read    : "web/Lists/getbytitle('Tasks')/items?$select=Id,GUID,Title,StartDate,DueDate,Status,PercentComplete,ParentIDId&",
                    update  : '',
                    destroy : ''
                },
                hostWebUrl  : this.hostWebUrl,
                appWebUrl   : this.appWebUrl
            }
        }
    });

    this.getUserName();
}
We only need to set an endpoint for the `create` and `read` operation while endpoints for `update` and a `destroy` operation are set in the meta data of the retrieved items. You can read more about this in our guide.
The property `renderTo` is set to `ganttplaceholder`, this is the DIV we have added in `Default.aspx` (production) and in `index.html` (development).
The `height` and `width` we set both to `100%` since we want to make the Gantt chart responsive. We do this by applying a piece of CSS in the `Main.scss` file
view/main/Main.scss
.scheduler {
    position   : absolute;
    right      : 20px;
    top        : 150px;
    width      : calc(100% - 40px);
    height     : calc(100% - 150px);
    min-height : 343px;
    background : #f0f0f0;
    border     : 2px solid #d0d0d0;
}
Time To Deploy
When you have modified your application according to your needs and have built it with Sencha cmd you are almost ready to deploy. First open the AppManifest file.
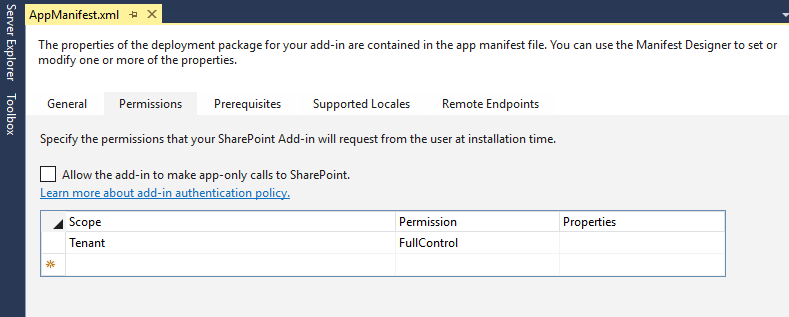
There you can set your permissions for the application. When hitting deploy, the previous deployed application (if any) will get uninstalled and the Add-In will be added to your SharePoint Site.
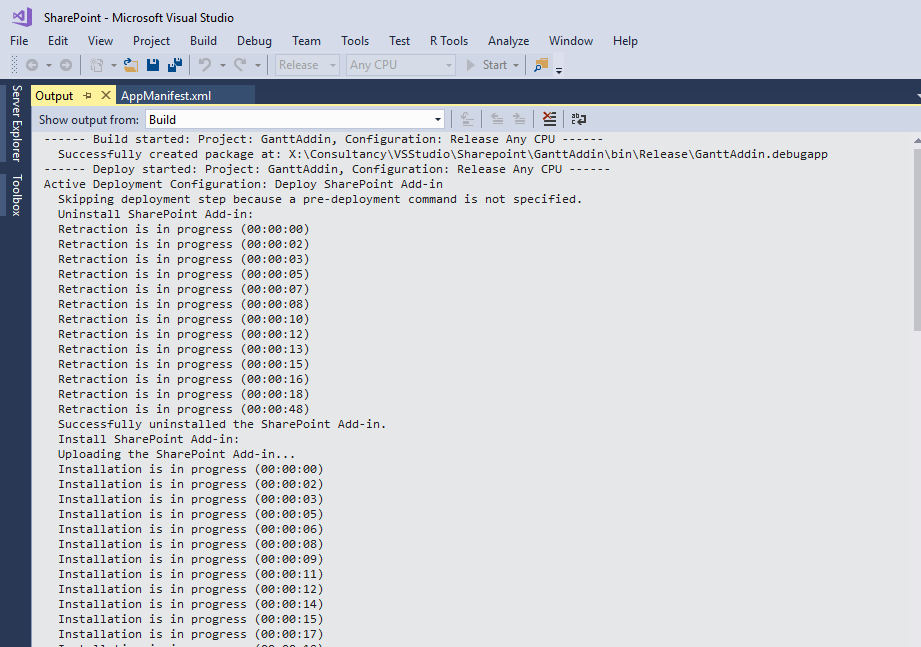
This progress can take some minutes. For that reason we recommend to have a `developer` setup to be able to work with `sencha app watch` in a local environment. In the solution we provided some dummy data and we made some switches to be able to run the application outside context of the SharePoint Site as well.

That’s it!
When done you will get prompted to trust your application. Don’t forget to hit that “Trust It” button and enjoy the result.
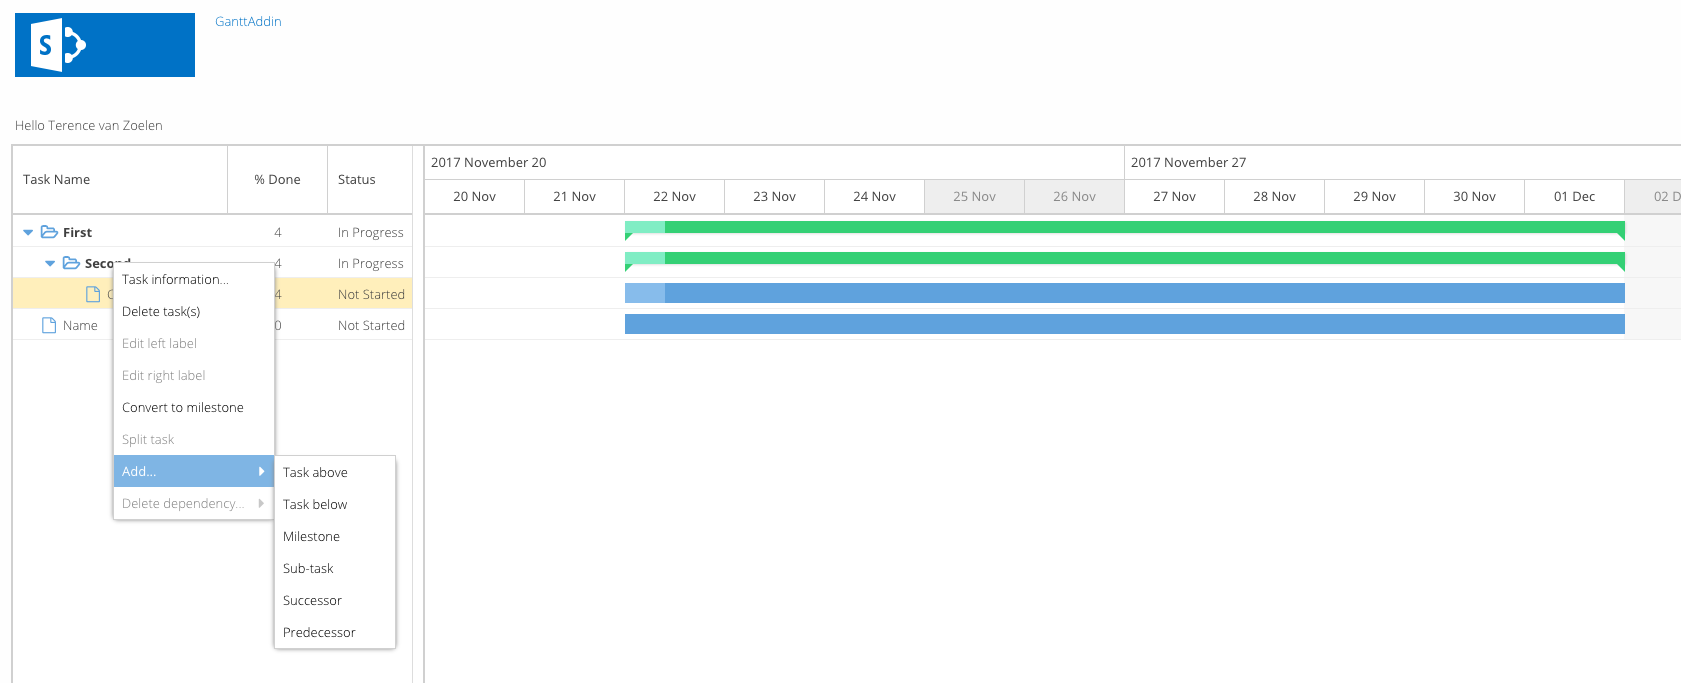
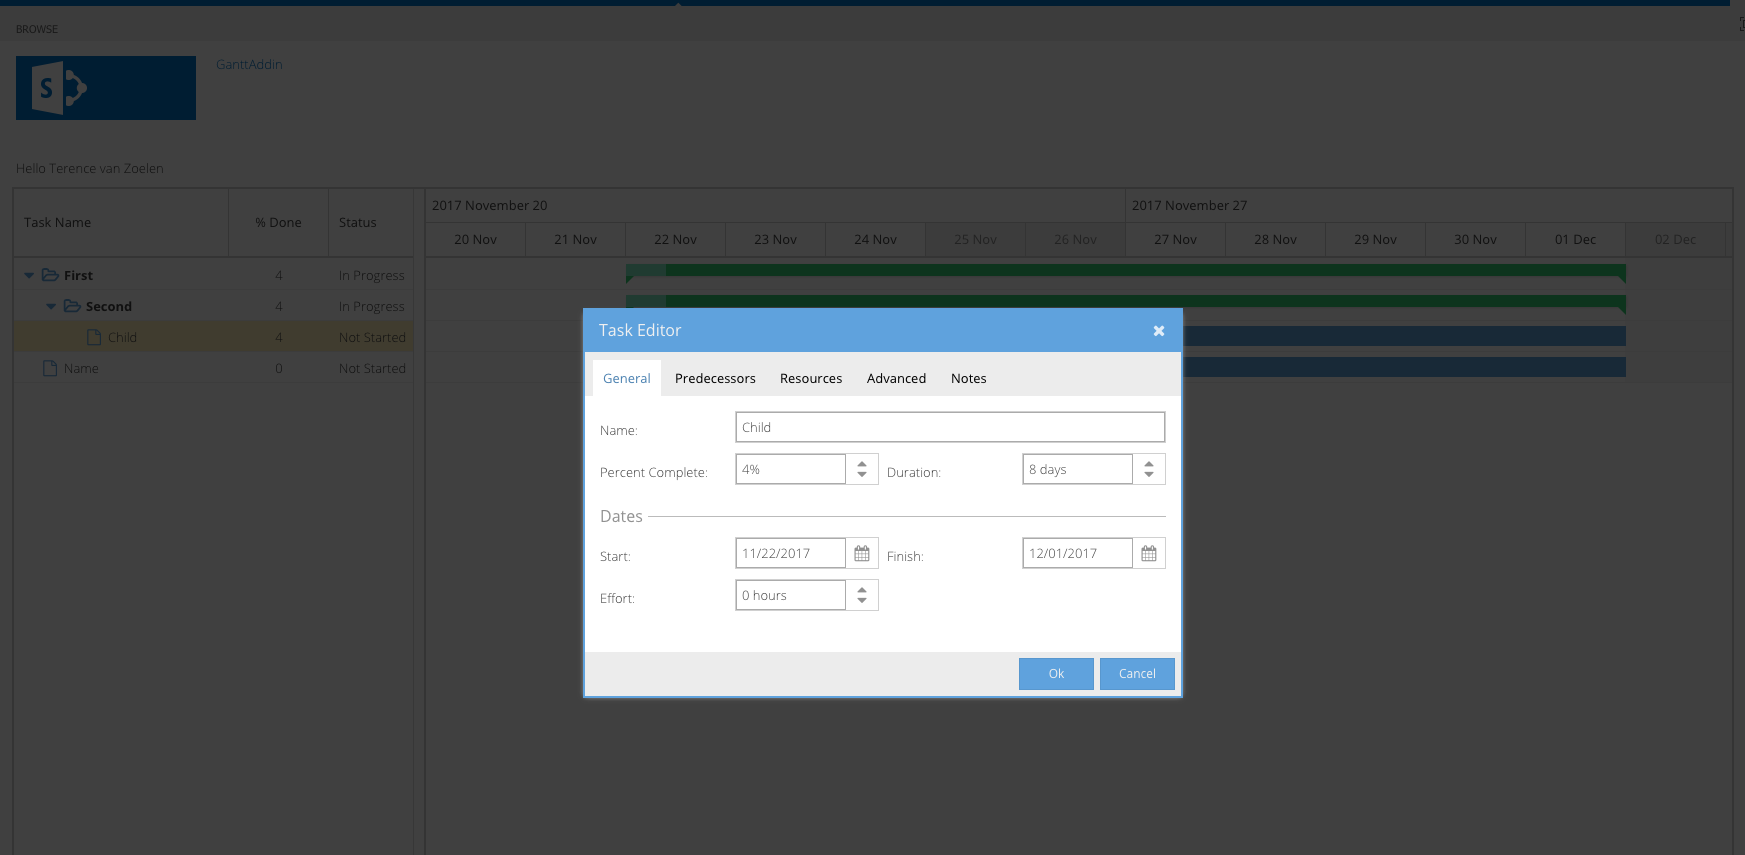
You can add basically any plugin, component or Ext JS widget to SharePoint following this procedure. Like we added the taskeditor plugin which gives you a far more advanced editing facility for your TaskList items in SharePoint.
Conclusion
With the solution above, we’ve showed that you can easily get a very powerful Gantt chart embedded in your SharePoint environment to replace the basic version that ships with SharePoint. You can extend this solution any way you want to add custom columns or views. For each data store you use you can make use of the proxy we have defined in this example. It basically all comes down to writing queries for the REST endpoints.
We hope you found this guide useful, and that you’re able to add any Bryntum component to your SharePoint site. If you encounter any issues setting up your Gantt chart, please post in our forums and we’ll assist you. //forum.bryntum.com/.